Regency dress sewing part 1 - the bodice
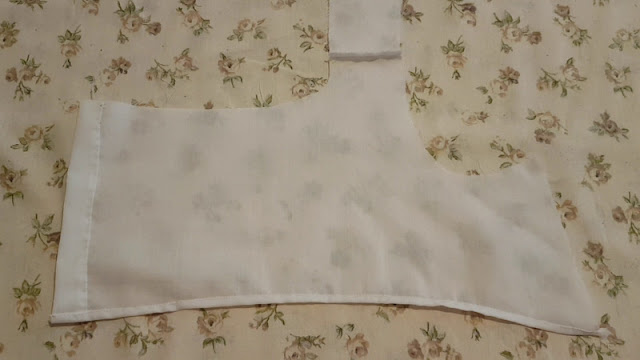
November 13, 2020For the front lining I folded back the bottom seam and the front seam and sewed them. The shoulder piece was also added in this step.
This is my back lining piece.
Then I folded back the seams on the front side of the white lining and sewed it. I use a hem stitch for almost 90% of the seams.
Front and part are then pinned and sewn together.
This is the outer fashion fabric, I started by adding the shoulder part, then sewing the bottom and then pinning down the front.
Once again the front side was pinned and sewn, these ar almost the same steps as the lining.
Front and back of the lining.
The back of the front fashion is then pinned to the lining. I probably ironed the back at least three times but it is still full of wrinkles. Maybe I should invest in a steamer or something like that.

After sewing the neckline, I pinned the sides to both lining and fashion fabric layer. The seam allowance of the sides had been ironed back and it made it very easy to pin. I matched up the sides with the armsycle and no idea why, but the lining looks so tiny and uneven underneath it.
After the sides I pinned the front to the lining and through three layers.
For most of the project I used a hem stitch, but for attaching the sides and the front piece, I used a half-back and a normal back stitch. When this was done, it was finally time to add the ribbons. The first ribbon was the one on top. I used a big, blunt wool needle to thread the ribbon into the bodice.It already looked so cute with the ribbon.I made a tunnel with the ribbon I had used at the top to make a tunnel, and then threaded in the same ribbon.
The shoulder strap was my next step. I folded the fashion fabric over the lining and pinned it. Afterwards I sewed together the back- and front strap piece and cut away the extra.
The sleeves were definitely not my favourite part, but they usually aren't. As I just made my first regency dress, I didn't want to go outside of the instructions. Even though I really wanted to make some extravagant sleeves with ruffles and overlays. But I will do so the next time.
The sleeve was cut out and the sides sewn together. At the top was a small area that had to be gathered, so I did that too.
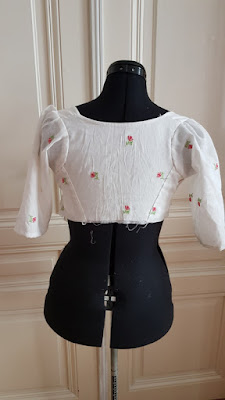
And this is the finished bodice, front and back. The sleeves look a bit weird on my doll but that's only because her shoulders are wider than mine.
It looks pretty on the doll and then I tried it on and came to the realization, that it was too short. (I coloured my hair pink in September, now I have to get a wig :D)
At that point, I almost lost my marbles. I made a mock up, I hand sewed everything and now it didn't fit? I went to bed and tried to calm down.
Two days later, I decided to rip out the front part and re-do it. The back- and sidepart were okay so I didn't touch them. It really didn't take long to redo the bodice and after a few days, the bodice was done, again. And it fit! Hooray.
If you want to watch the video I made, follow my youtube channel: Auris Lothol
Part 2 will follow son.
All the best,
Auris Lothol


0 Kommentare